Monday, April 16, 2012

Deconstructing upholstered chair

I've learned that taking out staples is a lot more difficult and time consuming than I thought!  No wonder people charge so much to reupholster!

Last night I finally got the last pieces of fabric off the chair.  I only managed to cut or stab myself 3 times.  In diving into a large upholstery project, there are a few tips I've discovered along the way. 

First, there is an order of operations for removing the old upholstery fabric.  For a chair that has fabric on the front and on the back, you'd want the remove the center back panel first.  This will also be the last panel of fabric that goes on to the finished chair.  It's important to remove all the staples.  Instinctively, you would start at the top and work your way down, which is fine, but it will actually be easier if you remove the bottom row of staples first.  If you wait to remove the bottom row last, all the fabric will be flopping all over the place and getting in your way.  After you get a good handful of staples removed, you will be able to pull the fabric, but mostly likely the staples will remain in place.  Pulling on the fabric in some instances does help to loosen the staples, but you want to make sure not to rip the fabric because you will be using it as a pattern later on.


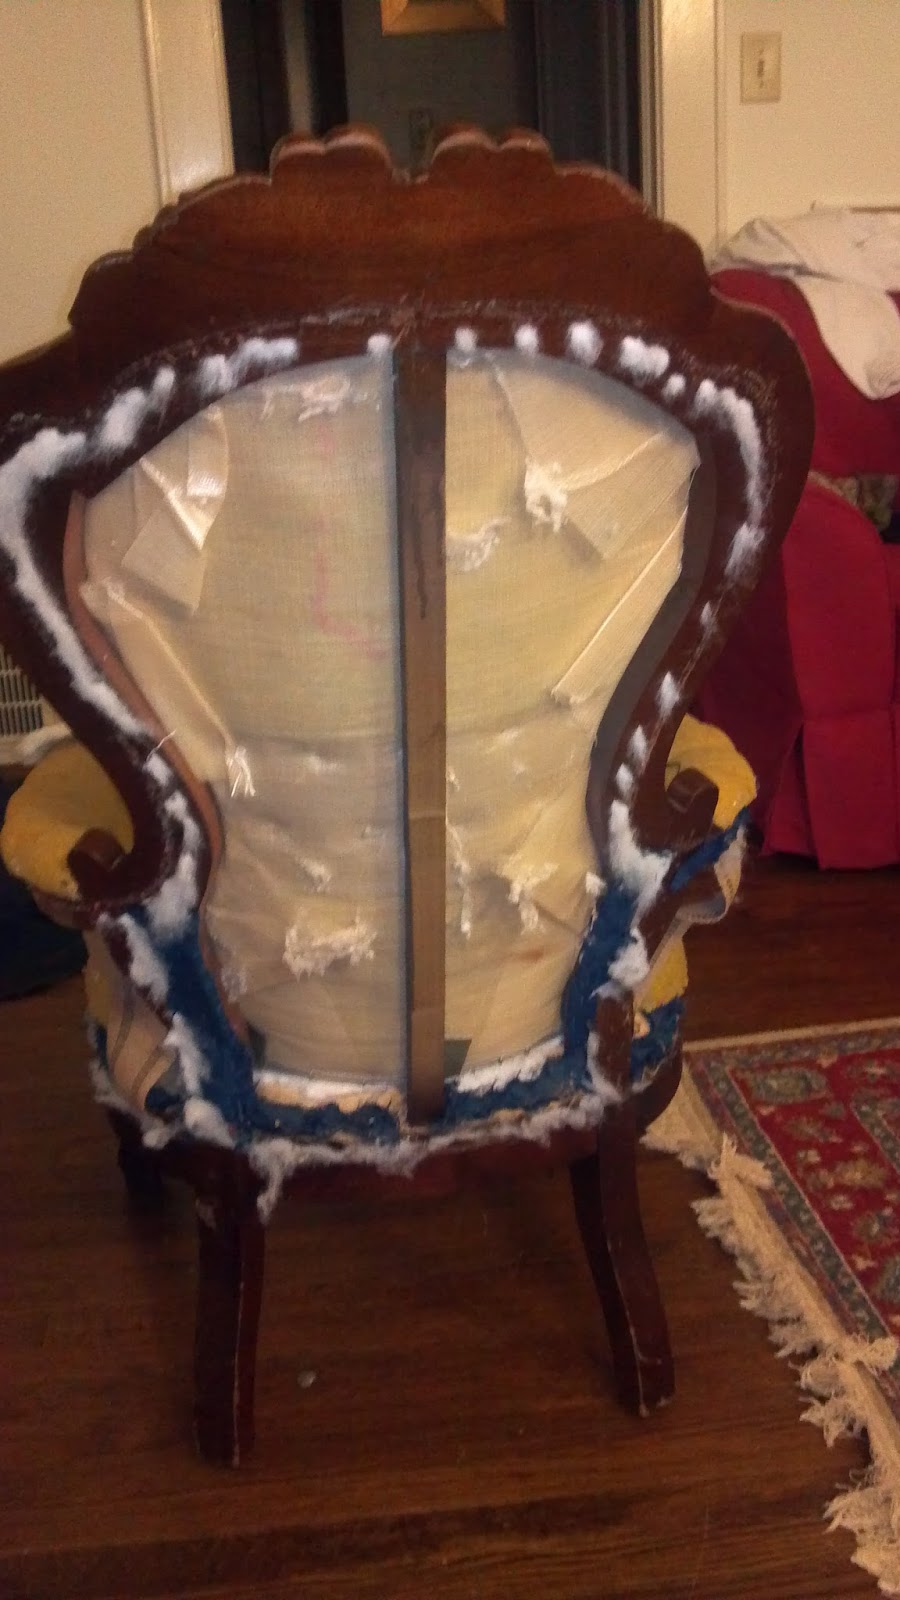
After the outer back and the outer sides have been removed, you can start working on the inner sides and back.  For the chair that I was working on, there were a lot of tufts and buttons, so I had to remove the cushioning on the back and on the sides (on the outside of the chair) in order to cut the knots that were holding the buttons in.  You could, I suppose, cut the buttons off from the front side, but if you were to be re tufting when you reupholster than you'd have to remove the batting from the back anyways when you tie the new buttons in.


When you start removing the fabric from the arms of the chairs, it can get pretty disgusting, especially where the fabric from the arms is stapled to the fabric of the seat cushion.  At this point I would definitely recommend having a vacuum on hand, and you may want to consider wearing rubber gloves.  Just to get some perspective, I found about a dollar worth of change, a cereal bowl worth of old Cheerios, pretzels and hardened cheese, a half a cat worth of fur, and an old fishhook. 


After I removed all the fabric and staples from the chair, it was time to remove all the hot glue remnants from where the previous owner (or upholsterer?) had hot glued all the welting to the junction of the fabric and the wood.  I choose to sand the hot glue off because I was going to be painting the chair anyway.  This would also be a fine way to go if you were going to refinish the furniture.  If you were trying to avoid painting or refinishing, I would carefully remove any glue or fabric remnants with pliers.  You'd also want to be careful when removing the staples because it's very easy to get a row on indented lines from the staples remover all along the edge of the wood.

Tuesday, April 10, 2012

Upholstery Project

My first piece was a dining chair.  I had a Thonet Bistro chair upholstered in this hideously decaying emerald vinyl.  After taking apart the seat and removing the vinyl, I embarked on the project of sanding off all the old stain and varnish.  I thought that part of the project would go pretty quick, but as it turned out, it was the longest part!  I'm quite familiar with sanding on flat surfaces, but I've never had the opportunity to sand bentwood, will all it's curves and grooves.  When the sanding was completed, I stained it with minwax stain/poly in one.  I ended up putting two coats on and it came out great!

For the seat, I choose an upholstery fabric that I had gotten from my mom a while back.  She had gotten it from a friend's mother, and based on it's color and pattern, I'd say it was from the 60's.  It's a really awesome limey-green velvet flower pattern.  I had to take a deep breath before I started cutting it up, but now that it's on my refinished Thonet chair I feel excited that I finally got to use it.  (I still have some left!)
Reupholstered Thonet Chair, with scale figure (Romeo)

I have 1-2 ottomans that I'm working on, while simultaneously working on "the big chair".  It's a little bit more complicated than what I originally anticipated, but I think it will look really cool in the end.  I'm not going to try to deal with all the sanding of all the intricate parts.  Instead I'm going to hit a few spots with the orbital, then spray the whole thing white.  I'll go back over it with a fine sandpaper in a few spots, then hit it with a stain to get the "dirty" look.  I learned this technique when we went to our Sherwin Williams field trip, and I think it will be a lot more time efficient.

The "big chair"
Back of the "big chair"
I ordered my supplies from Amazon.com yesterday so they should be in towards the end of the week.  I had a really tough time picking out fabrics because there were a lot of them that I really liked.  Because of the tufting and the grooves in the foam, I had to pick a fabric that wouldn't look odd when part of the pattern cuts off.  I envisioned the fabric to look a little bit more on the modern side, to juxtapose with the style of the chair. 

Fabric swatch of upholstery fabric

Wednesday, April 4, 2012

My Fabric!

My fabric came in yesterday!  I love it.  I especially love the upholstery sample I made.  I'm going to order 2 yards of it and reupholster an ottoman with it.  It was especially designed to go with upholstery pieces that are tufted - that is, buttons and pleating.  The pattern repeat on the upholstery fabric creates a circle where the botton will go.

Upholstery Sample

Kona Cotton
Closeup of Kona Cotton Design

Recycled-Parts Furniture

Doing my upholstery project in Studio has inspired me to rekindle my love of furniture.  I especially love the eclectic pieces, made from up-cycled materials.  I'm starting a collection of my favorite pieces on my blog, so I'll post them as I run across them. 
Here's one I found today, from Dornob.com.

These interesting pieces are made from scrap wood and melted tin that was found locally (local to the artist).  He cut the wood to make a uniform shape then melted the tin around the pieces to hold them into place.  You can find more of this designer's work at his web pagehttp://www.pepeheykoop.nl/.